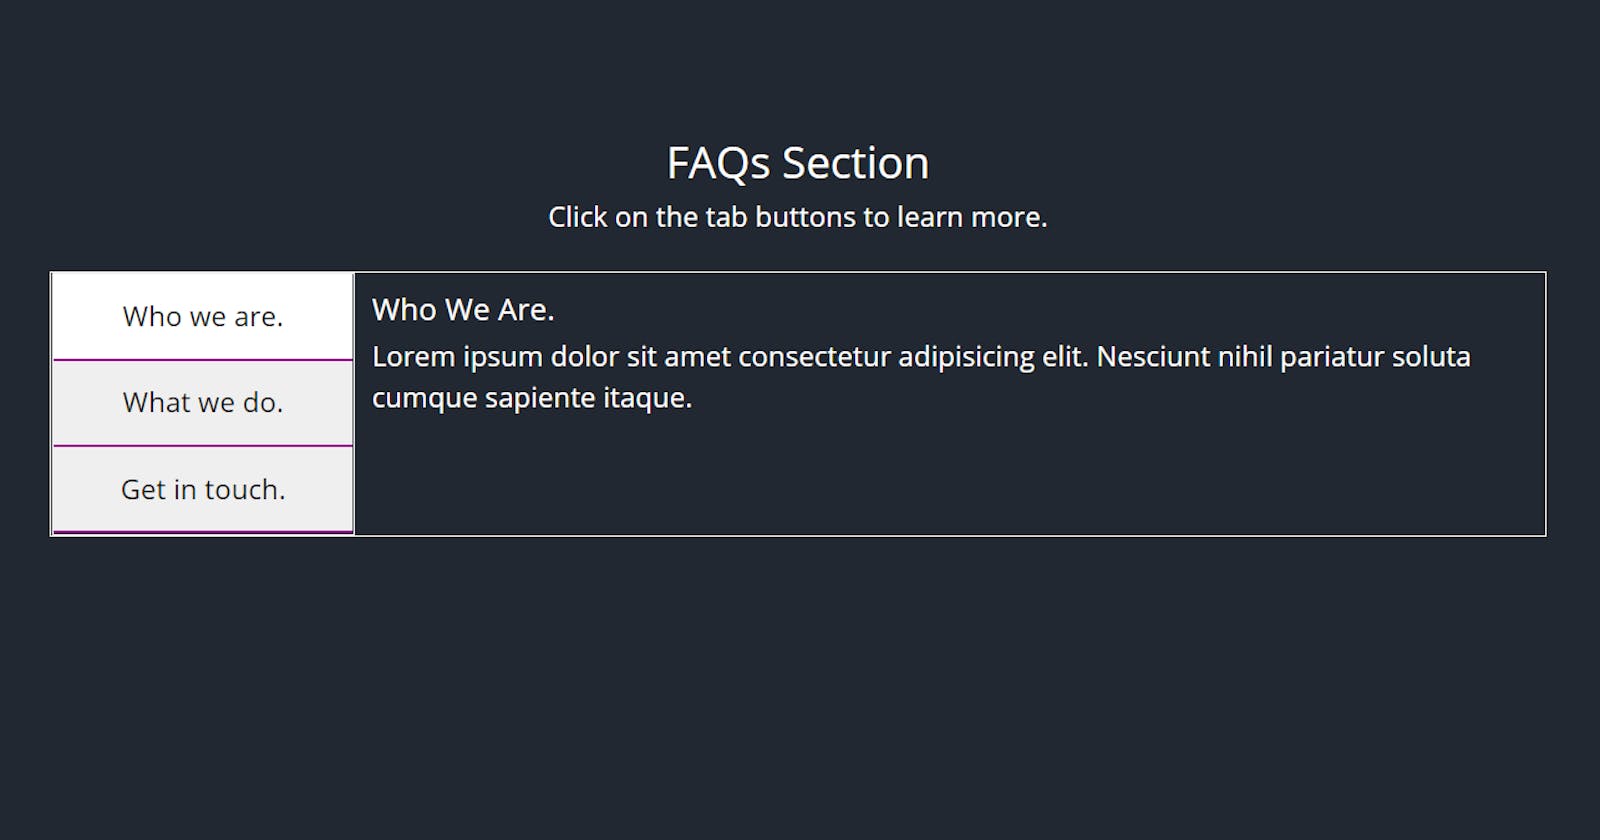
Hello friends, Today, I am going to show you how to create the above project. A vertical tab is quite common in many websites today and can be used in the FAQ section.
Let’s get started. First, We write the markup and CSS for the project
Markup
<!DOCTYPE html>
<html lang="en">
  <head>
    <meta charset="UTF-8" />
    <meta name="viewport" content="width=device-width, initial-scale=1.0" />
    <title>FAQs Section</title>
    <script
      src="https://kit.fontawesome.com/1935d064dd.js"
      crossorigin="anonymous"
    ></script>
    <link
      href="https://cdn.jsdelivr.net/npm/bootstrap@5.0.0-beta2/dist/css/bootstrap.min.css"
      rel="stylesheet"
      integrity="sha384-BmbxuPwQa2lc/FVzBcNJ7UAyJxM6wuqIj61tLrc4wSX0szH/Ev+nYRRuWlolflfl"
      crossorigin="anonymous"
    />
    <link rel="stylesheet" href="styles.css" />
  </head>
  <body>
    <div class="container">
      <div class="text">
        <h1>FAQs Section</h1>
        <p>Click on the tab buttons to learn more.</p>
      </div>

      <div class="tabs">
        <div class="tab-links">
          <button class="tab-link active" data-filter="about">
            Who we are.
          </button>
          <button class="tab-link" data-filter="services">What we do.</button>
          <button class="tab-link" data-filter="contact">Get in touch.</button>
        </div>

        <div class="tab-contents">
          <div class="tab-content about">
            <h3>Who We Are.</h3>
            <p>
              Lorem ipsum dolor sit amet consectetur adipisicing elit. Nesciunt
              nihil pariatur soluta cumque sapiente itaque.
            </p>
          </div>

          <div class="tab-content services">
            <h3>What we do.</h3>
            <p>
              Lorem ipsum dolor sit amet consectetur adipisicing elit. Nesciunt
              nihil pariatur soluta cumque sapiente itaque.
            </p>
          </div>

          <div class="tab-content contact">
            <h3>Get in touch.</h3>
            <p>
              Lorem ipsum dolor sit amet consectetur adipisicing elit. Nesciunt
              nihil pariatur soluta cumque sapiente itaque.
            </p>
          </div>
        </div>
      </div>
    </div>

    <script src="script.js"></script>
  </body>
</html>
CSS
@import url("https://fonts.googleapis.com/css2?family=Open+Sans:wght@300;400;600;700&display=swap");

:root {
  --white: #fff;
  --black: #1c2b2d;
  --blue: #31326f;
  --light-blue: #005490;
  --color-primary: #9d0191;
  --color-sec: #db6400;
  --color-grey: #eee;
  --color-dark-grey: #222831;
}

* {
  margin: 0;
  padding: 0;
  box-sizing: border-box;
}

html {
  font-size: 10px;
}

body {
  font-family: "Open Sans", sans-serif;
  background: var(--color-dark-grey);
  color: var(--white);
}

p {
  font-size: 1.6rem;
  line-height: 1.5;
}

img {
  width: 100%;
}

.container {
  max-width: 900px;
  margin: 0 auto;
  padding: 0 20px;
  margin-top: 10rem;
  /* border: 2px solid red; */
}

/* start here */

.text {
  text-align: center;
  margin-bottom: 2rem;
}
.tabs {
  display: flex;
  border: 1px solid var(--color-grey);
}

.tab-links {
  /* border: 2px solid red; */
  display: flex;
  flex-direction: column;
  align-items: flex-start;
  width: 25%;
  border: 1px solid var(--color-grey);
  z-index: 1;
}

button.tab-link {
  padding: 1.2rem;
  width: 100%;
  font-size: 1.6rem;
  border: none;
  outline: none;
  border-bottom: 2px solid var(--color-primary);
}

.active {
  background-color: var(--white);
}

.tab-contents {
  padding: 1rem;
}

.tab-content {
  display: none;
  animation: slide-right 0.5s ease 1;
}

.about {
  display: block;
}

/* SLIDE ANIMATION */
@keyframes slide-right {
  0% {
    transform: translateX(-10rem);
  }

  100% {
    transform: translateX(0);
  }
}

@media screen and (max-width: 600px) {
  .tab-links {
    width: 50%;
  }
}
Now let’s write the JavaScript logic for the project. But we must first define how we want our vertical tabs to behave.
Two things happen when we click on the tab link on the left
- The background color of the Tab link changes from grey to white and this is achieved by adding an active class to the tab link when a user clicks on it.
- The content associated with that class is displayed with a slide-out animation. We are able to identify the associated content using the dataset property in which we match the value of the data-filter attribute set on each tab link in the markup to the class set on each tab content. Now let’s write the logic.
First, Let’s create variables to target the element on the page.
const tabLinks = document.getElementsByClassName("tab-link");
const allContent = document.querySelectorAll(".tab-content");
Next, we create a for loop on the tabLinks which loops through all the tab link items on the page. We can loop through the tabLinks variable because it was created using document.getElementsByClassName which creates a list of items matching a specified class. The so-called HTML Collection.
for (let i = 0; i < tabLinks.length; i++) {

}
Inside this loop we can then add the logic to switch the active class to the link item that is clicked.
for (let i = 0; i < tabLinks.length; i++) {
    // Switch active class on tab links
  tabLinks[i].addEventListener("click", function (e) {
    const current = document.getElementsByClassName("active");
    current[0].className = current[0].className.replace(" active", "");
    this.className += " active";
});
}
Note: there is another way to switch active class with javascript.
Then, using the dataset property, we can display the corresponding content on the page. We are going to use the forEach array method on the allContent variable. Don’t forget that the allContent variable was created using the querySelectorAll method which creates a NodeList. We can apply the forEach array method on this nodeList.
for (let i = 0; i < tabLinks.length; i++) {
    // Switch active class on tab links
  tabLinks[i].addEventListener("click", function (e) {
    const current = document.getElementsByClassName("active");
    current[0].className = current[0].className.replace(" active", "");
    this.className += " active";

    // Switch Tab Content
    const filter = e.target.dataset.filter;
    console.log(filter);

    allContent.forEach((content) => {
      if (content.classList.contains(filter)) {
        content.style.display = "block";
      } else {
        content.style.display = "none";
      }
    });
  });

}
And now we have a working vertical tab section.
If you found this tutorial useful, then you should check out my 100Days of JavaScript Course which I created to help beginners/intermediate level JavaScript developers sharpen their JavaScript skills.
For all my courses, visit my website using the link at the end of this post.
Thanks for reading this article.
if you enjoyed it, feel free to connect with me:
Website: ZinoTrustAcademy.com
Twitter: @ZinoTrust
YouTube: ZinoTrust Academy
GitHub: ZinoTrust
